
Understanding Spray Foam Removal
What is Spray Foam?
Spray foam is a widely used insulation material that consists of a mixture of polyurethane and other compounds. When sprayed onto surfaces, it expands and hardens, forming a solid layer that provides excellent thermal insulation and soundproofing. Spray foam is typically applied in attics, walls, and crawl spaces, offering homeowners significant energy savings. However, while it serves to improve insulation and reduce energy costs, there may come a time when spray foam removal is necessary due to various reasons, such as aging, damage, or moisture-related issues.
Why Removal is Necessary
Spray foam removal may be essential for several reasons. Over time, the integrity of spray foam can diminish, leading to a decline in its insulating properties. Additionally, damaged spray foam can harbor mold or other pollutants, posing health risks to occupants. Renovations and remodeling projects also often necessitate removal for better aesthetics or redesign. Understanding the reasons for removal can guide homeowners and professionals in making informed decisions regarding their properties and ensuring that living environments remain healthy and efficient. Learn more about the spray foam removal process to understand better the importance of undertaking this task.
Common Challenges in Spray Foam Removal
One of the primary challenges in spray foam removal is its strong adhesion, making it notoriously difficult to remove without damaging underlying structures. The expansion properties of the foam can also create complications by filling gaps and crevices, making it challenging to access all areas effectively. Moreover, there are risks of damaging the surrounding materials during the removal process, which can lead to additional repair costs. Finally, improper removal techniques can release harmful particles or trigger allergic reactions. Understanding these challenges in advance can aid in planning effective removal strategies.
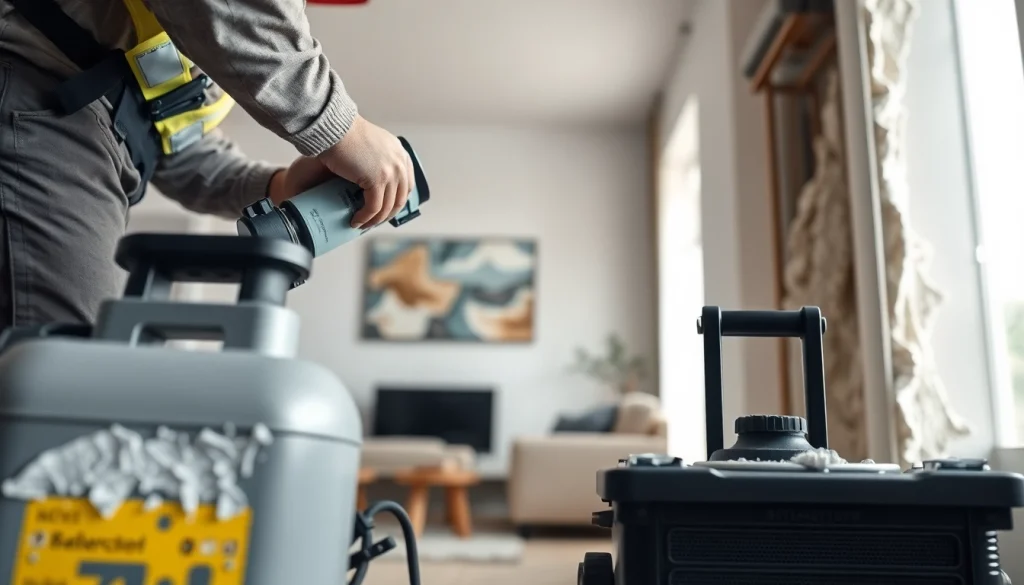
Tools and Equipment for Spray Foam Removal
Essential Tools Required
To successfully remove spray foam, several essential tools are required, including:
- Utility Knife: Ideal for cutting through foam layers.
- Oscillating Tool: Useful for broader and more aggressive removal.
- Scrapers: Manually scrape off foam for better control.
- Heat Gun: Helps loosen the adhesive properties of the foam.
- Vacuum: Suitable for cleaning up foam particles post-removal.
Having the right tools not only enhances efficiency but also minimizes the risk of damage to surrounding structures during the removal process.
Safety Equipment for Technicians
When embarking on a spray foam removal project, ensuring adequate safety measures is crucial. Key safety gear includes:
- Respirator Masks: Protect against harmful particles and fumes.
- Safety Goggles: Shield the eyes from debris and irritants.
- Protective Clothing: Wear long-sleeved shirts and gloves to avoid skin contact.
- Ear Protection: Crucial when using power tools to prevent hearing damage.
Utilizing appropriate safety equipment can significantly reduce health risks and ensure a safer working environment.
Choosing the Right Removal Methods
Selecting an effective removal method involves considering the area of application, the type of foam used, and the extent of the damage. Common removal methods include:
- Mechanical Removal: This involves using tools like oscillating saws and scrapers to physically remove foam.
- Chemical Removal: Certain solvents can break down the foam, making it easier to remove.
- Combination Techniques: Often, a combination of mechanical and chemical techniques is necessary for optimal results.
Choosing the right method can ensure effective removal while minimizing the risks associated with damaging underlying surfaces.
Step-by-Step Guide to Spray Foam Removal
Preparing the Workspace
Preparation is key for a successful spray foam removal process. Start by clearing the area of any furniture, decorations, and obstacles. Cover surfaces that may not be removed, such as flooring or appliances, using drop cloths or plastic sheeting. Ensure adequate ventilation to reduce inhalation of dust and irritants. Gathering all necessary tools and safety equipment before beginning the removal can also streamline the process and minimize interruptions.
Executing the Removal Process
Once the workspace is prepared, begin executing the removal process:
- Score the Foam: Use a utility knife to score the foam along edges and seams. This practice creates cut lines for easier handling.
- Apply Heat (if using a heat gun): Gently apply heat to loosen the foam’s grip on surfaces, making it easier to peel away.
- Utilize Tools: Use the oscillating tool and scrapers as needed to remove the foam systematically.
- Dispose of Material: Properly dispose of the removed foam and any debris, adhering to local regulations.
Following these steps can help ensure a streamlined removal process while minimizing risks and complications.
Post-Removal Cleaning and Preparation
After removing the spray foam, it’s essential to undertake thorough cleaning and preparation. Use a vacuum cleaner to collect any leftover particles or debris. Inspect the surface for any damage and address it promptly. This step may involve filling holes or gaps and sanding rough areas for a smoother finish. It’s crucial to prepare the area well for any future insulation or repairs to ensure longevity and efficiency.
Best Practices for Successful Spray Foam Removal
Tips for Efficiency
To increase efficiency during the spray foam removal process, consider the following tips:
- Plan and organize your tools to reduce downtime during the removal.
- Work in sections to maintain focus and manage the workload effectively.
- Keep a checklist to ensure that no steps are missed throughout the process.
By adopting these practices, technicians can execute spray foam removal projects in a more efficient manner.
Avoiding Damage During Removal
To prevent damage to underlying materials during removal, it’s crucial to:
- Lightly score the foam before cutting to help manage the depth of removal.
- Use the appropriate tools for different surface types, understanding their potential risks.
- Take your time and avoid using excessive force that can lead to accidents or injury.
Implementing these strategies ensures that surrounding structures remain intact and minimize the need for additional repairs post-removal.
Ensuring Safety for Homeowners
In addition to protecting technicians, engaging in safety practices ensures the protection of homeowners. Clear any occupants from the removal area, ensure proper ventilation, and communicate any potential hazards involved in the process. Utilizing barriers or temporary fencing can prevent unauthorized access to the workspace and ensure a safer environment for all parties involved.
FAQs About Spray Foam Removal
How long does spray foam removal take?
The time required for spray foam removal can vary based on the size of the area and the methods used, ranging anywhere from a few hours to several days for more extensive projects.
Is professional help needed for spray foam removal?
While some homeowners may opt for DIY removal, professional help is recommended for efficiency, safety, and ensuring no damage occurs during the process.
Are there any health risks during the removal process?
There can be health risks due to dust, irritants, and fumes released during removal, making it vital to use protective gear and ensure proper ventilation.
What happens after spray foam is removed?
Once removed, the areas need to be cleaned, inspected for damage, and repaired as necessary, ensuring they are prepped for new insulation or renovations.
Can I do spray foam removal myself?
DIY spray foam removal is possible, but it requires proper tools, safety precautions, and may involve risks; professional assistance can mitigate these concerns.